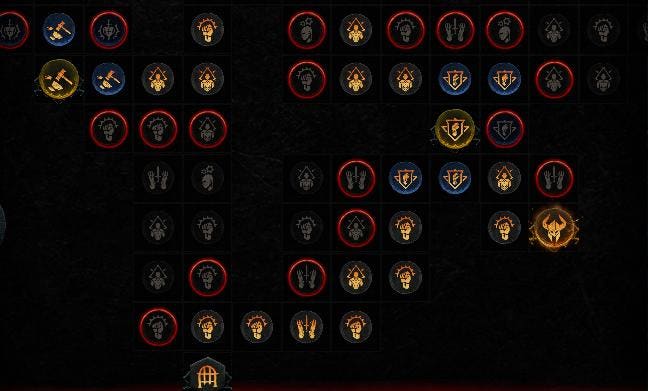
I have been sinking a ton of time into Diablo 4, but one of the main systems that eluded me after all this time was the concept of the Paragon system. I mean, I knew how to put points in it and navigate around the board, but glyph slots? Additional boards to add and rotate? It was a lot, and it took me way, way too long to figure out how to use this effectively. But these are massive power additions once you figure them out, and so I thought I’d do an explainer here. Just don’t ask me to explain how to max renown.
GLYPHS
The best way to think about glyphs is as a modification of Diablo 3’s gem system. But instead of inserting them into your character directly, you are inserting them in your paragon board. But you level them in a similar way to how you did it in Greater Rifts. If you didn’t play Diablo 3, you don’t know what I’m talking about, so let me explain.
Glyphs you will find in the wild have two main properties once you buy their paragon socket and put them in your board. One is a bonus based on how many stat nodes you’ve purchased in the area of the glyph, represented by a red zone. This bonus increases per specific stat node the more you level the glyph, and when you hit level 15, the radius will expand, including even more of those stat nodes. On larger boards you can expand it again at higher levels. If you meet a stat node minimum, you will activate a second bonus.
So for instance, my stun mace build has a glyph with a main bonus of increased mace damage. At level 15, that’s 4.1% increased damage per slot. When the glyph had a small radius, that was something like 30% more mace damage. But when I expanded it, it became 57% because more strength nodes were included. And since I had 25 total strength in that area too, I got the secondary bonus which is 30% more mace overpower damage.
You level glyphs at the end of nightmare dungeons in the little store plant thing that appears in the middle of immunity bubble. The higher the nightmare dungeon level, the more XP you will get working toward leveling that glyph. It can take a lot of these, but higher ones will get you there faster. Make sure you are putting them in the right areas of the board. You do not want to put a dexterity-based one in an area that mostly has intelligence nodes, for instance. And that’s glyphs.
ADDITIONAL PARAGON BOARDS
You start with a basic one, but you can add more from there, and I think the cap is five. Additional boards will have one main legendary node that is essentially a new gear aspect by itself. To start with, you want to pick the board with the one most relevant one to your build (stun, bleed, whirlwind, whatever on Barb, for example).
You go to “preview” when you hit the board connection spot, then cycle through the boards and place the one you want.
Rotating the boards sounds weird but it’s actually pretty simple, it’s about what you want to prioritize. If you want to get the legendary aspect node quickly, you rotate the board so it’s close to your connector. If instead you want to go for the new glyph socket first, you rotate it that way. Or if there’s a cluster of yellow rare nodes you want, you spin it again. Then you connect and make your way toward your first priority.
More generally, yellow nodes are the most powerful ones besides legendary ones. They usually focus on big damage or defense boosts, and they are surrounded by related blue nodes. Those nodes may not lead to pathways to somewhere else necessarily, but you may want to fill out a “cluster” of those because they can add up to big bonuses (three nodes for 15% more damage on my mace, for instance). So don’t ignore them.
And that’s paragon boards? Mostly? Anyway, enjoy.
Follow me on Twitter, YouTube, Facebook and Instagram. Subscribe to my free weekly content round-up newsletter, God Rolls.
Pick up my sci-fi novels the Herokiller series and The Earthborn Trilogy.
Read the full article here


